Stellar MPC Wallet Update: Social Login, Workspaces and Payment Approvals

In September we published how we built an MPC wallet on Stellar: a reference wallet, stellar-wallet, where every key is split across three mpcium nodes and any two of them sign together. The key is never assembled in one place.
That version proved the signing model. It was built for one person holding one set of wallets. Real teams need more than that: an easy way to sign in, a shared place for company wallets, and a rule that stops one person from moving large amounts alone.
This update adds all three: social login, workspaces with roles and payment approval policies. The signing core is unchanged. Everything new sits in the layer above the MPC cluster.
Social login with Google and GitHub
You can now sign in with Google or GitHub, as well as with email and password. Developers trying the wallet can be in within seconds, and teams can use the identity provider they already manage.

Sign-in methods can be linked to one account. Under Settings → Linked accounts you can connect Google, GitHub or an email and password, and each of them opens the same account and the same wallets.

Login only controls who can open the app. It does not touch key material. A social login cannot sign a transaction on its own, because signing still needs two of the three MPC nodes.
Workspaces and roles
Every user gets a Personal workspace. You can also create team workspaces, such as one for your company, and invite teammates by email. Invitations appear in their own tab when the teammate signs in.

Everyone in a workspace can see its wallets. What they can do depends on their role:
- Owner: manages members, wallets and the approval policy
- Operator: sends payments and approves other people's payments
- Member: views wallets and history only

Payment approval policies
This is the most important change for teams. An owner can require that payments are approved by another owner or operator before they are signed.
The policy has three settings:
- Threshold (USD): payments above this value need approval. The app converts it to the asset amount using a live price, for example "about 9.96 XLM at $0.13 per XLM".
- Approvals required: how many other owners or operators must approve.
- Payments at or below the threshold: send immediately, or require approval too.
The policy fails closed. Assets without a live price, and any payment made while prices are unavailable, always need approval.

How a payment moves through approval
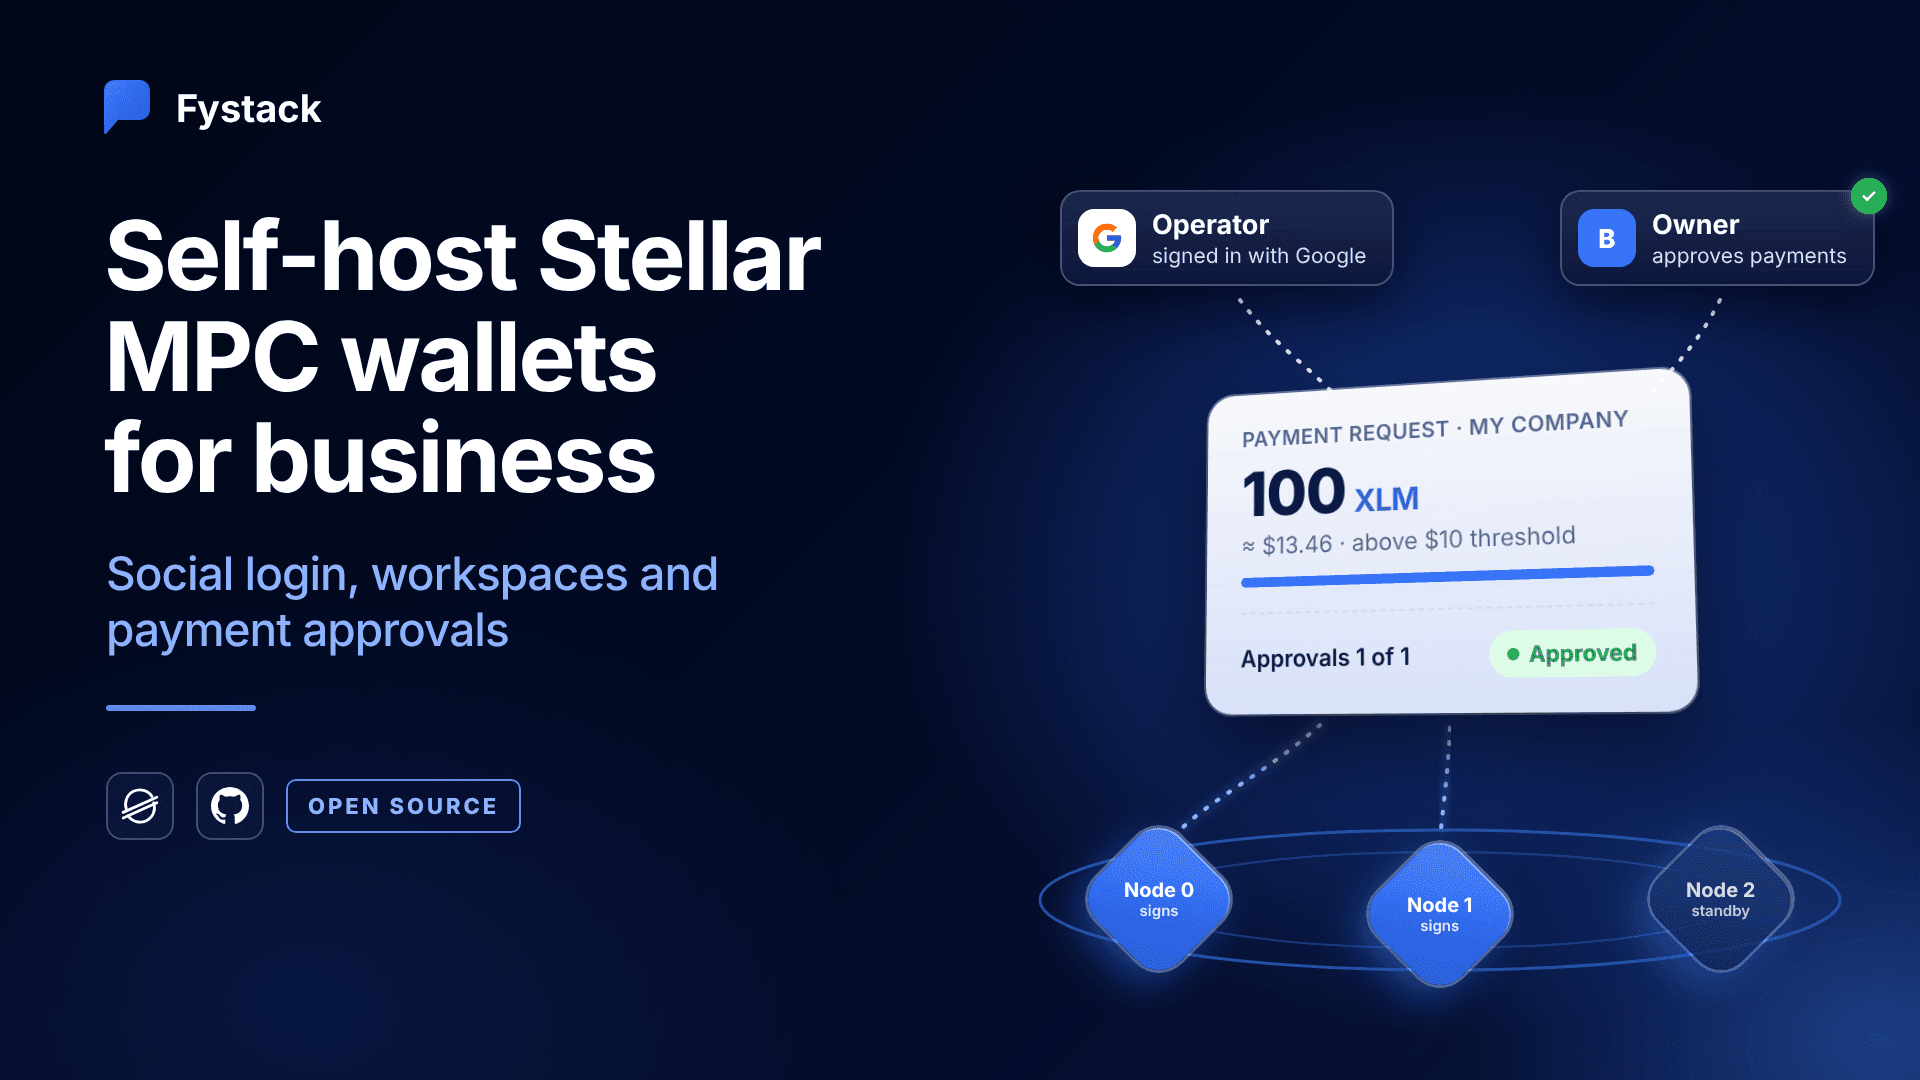
- An operator sends 100 XLM. It is above the threshold, so the payment is sent for approval instead of being signed. The request records the USD value, the price source and time, who started it, and when it expires.
- Other owners and operators see it under Approvals → Pending, marked "Needs your approval".
- Once enough people approve, the backend sends the transaction hash to the MPC cluster. Two of the three nodes sign, and the payment is broadcast to Stellar.
- The request keeps a full record: each response with its time, and the on-chain transaction hash.


The result is an ordinary Stellar payment with one normal Ed25519 signature. You can check it on a testnet explorer: e54f9739…7368c16.

This order matters. Approval happens before signing, so a payment that has not been approved never reaches the MPC nodes. Today the policy is enforced by the wallet backend. mpcium also has an optional authorization layer, where nodes require extra signatures from trusted authorizers before they sign. It is the natural way to move this check into the signing cluster itself.
About mpcium
All signing in this wallet is done by mpcium, our open-source MPC engine. Stellar is one integration. mpcium itself is chain-agnostic:
- Threshold signing (t-of-n) built on Binance's tss-lib, with t ≥ ⌊n/2⌋ + 1. In a 2-of-3 setup any two nodes can sign, and no single node can.
- Two curves: EdDSA (Ed25519) for Stellar, Solana and similar chains, and ECDSA (secp256k1) for Bitcoin, Ethereum and EVM chains.
- Secure by default: key shares are stored encrypted on each node, and every message between nodes is signed and verified.
- Simple infrastructure: NATS for messaging, Consul for discovery and health checks.
- Clients in Go and TypeScript, under the Apache-2.0 licence.
If you are building a wallet, an exchange or a payments product on Stellar or any other chain, you can run mpcium on your own servers and keep full control of your keys. Start with the mpcium documentation.
Where this stands
The wallet is still a reference build that runs on Stellar testnet and is self-hosted with Docker Compose. Do not use it for mainnet funds yet. You can run the whole stack locally with one command, ./start.sh. It starts NATS, Consul, three mpcium nodes, the backend and the UI. Full steps are in the repository README.
Questions or ideas? Join us on Telegram, star mpcium on GitHub, or request a demo if you want the production version of these controls on Fystack.